Tips for
Filming with Mobile Phone
A Beginner’s Guide
Table of Contents
Basic Techniques
Advanced Tips
Security Tips
Dos and Don’ts
Common aspect ratios and their use
Social Media Formats
Links and downloads
Mobile Phone Filming and Reporting
Whether you are a budding journalist, a social media enthusiast, or someone interested in creating compelling videos, this guide will help you learn the basics of filming and reporting with a mobile phone. Our goal is to provide you with the knowledge and skills needed to produce professional-quality content using just your mobile device.
Basic Techniques
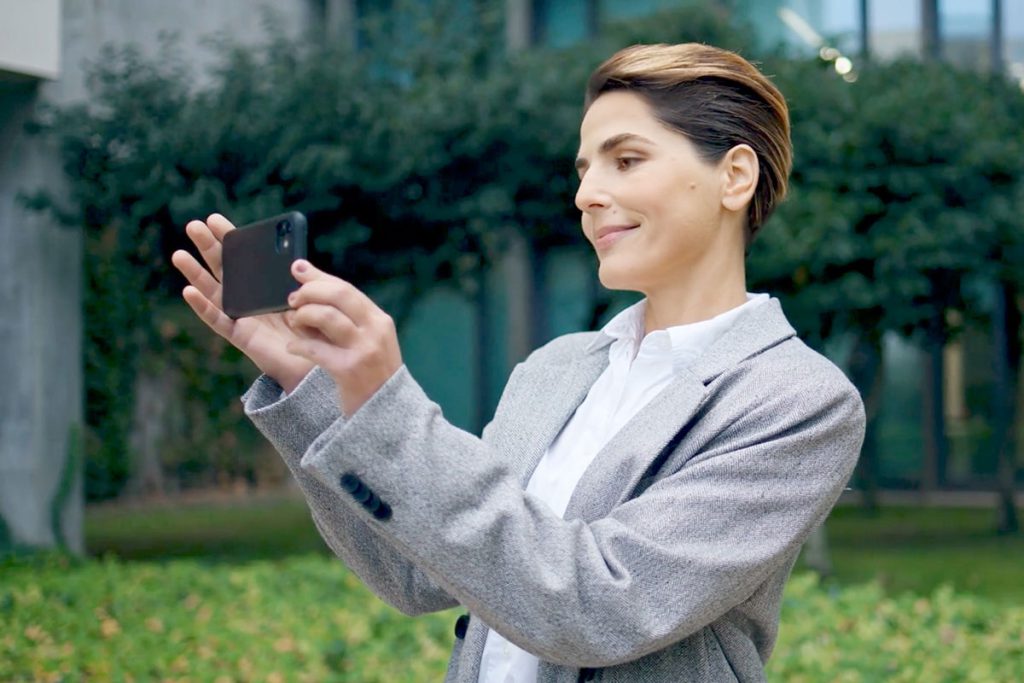
How to Hold a Mobile Phone When Filming
- Use Both Hands: Hold the phone with both hands to prevent shaking and keep a steadier frame. This technique is especially helpful for longer filming sessions
- Landscape Mode Over Portrait Mode: For most videos, hold the phone horizontally to capture a wider frame. This orientation is better suited for YouTube, TV screens, and most social media platforms
- Use a Tripod or Gimbal: If possible, use a small tripod or a gimbal designed for smartphones. These tools help keep the phone stable and reduce shaking
- Stay Calm and Breathe Steadily: Stay relaxed while filming and take deep breaths. Sudden movements or tension can cause shaky footage, so move smoothly and deliberately
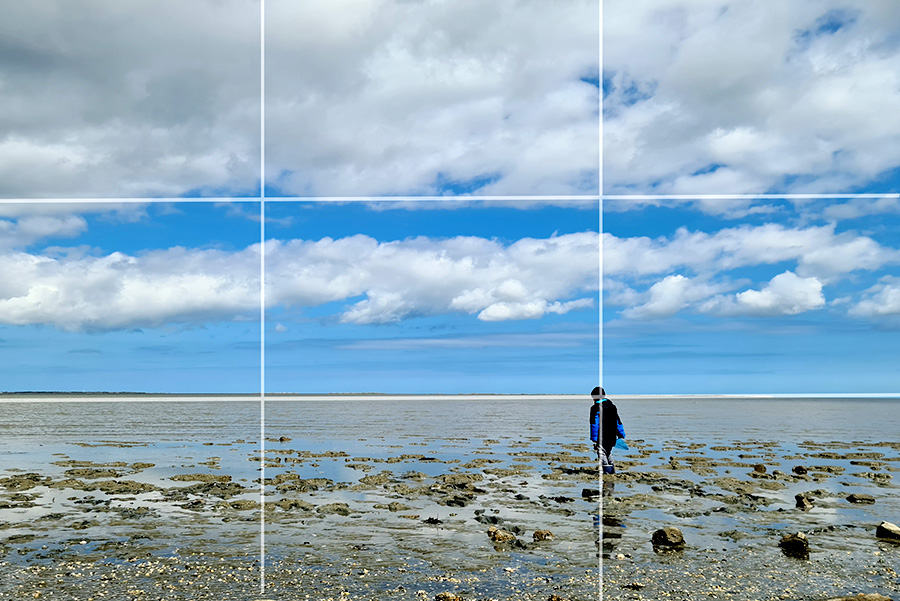
The Rule of Thirds
- Align Your Subject with the Lines: Place your main subject along one of the vertical or horizontal lines. This helps make the image look more balanced and visually appealing
- Use the Intersections: The intersections of the lines are the strongest focal points. For greater emphasis, position the most important elements of your shot at these intersections
- Create Negative Space: By positioning your subject in one-third of the frame, you leave space for other elements like background or environmental details, adding more depth to the photo or video
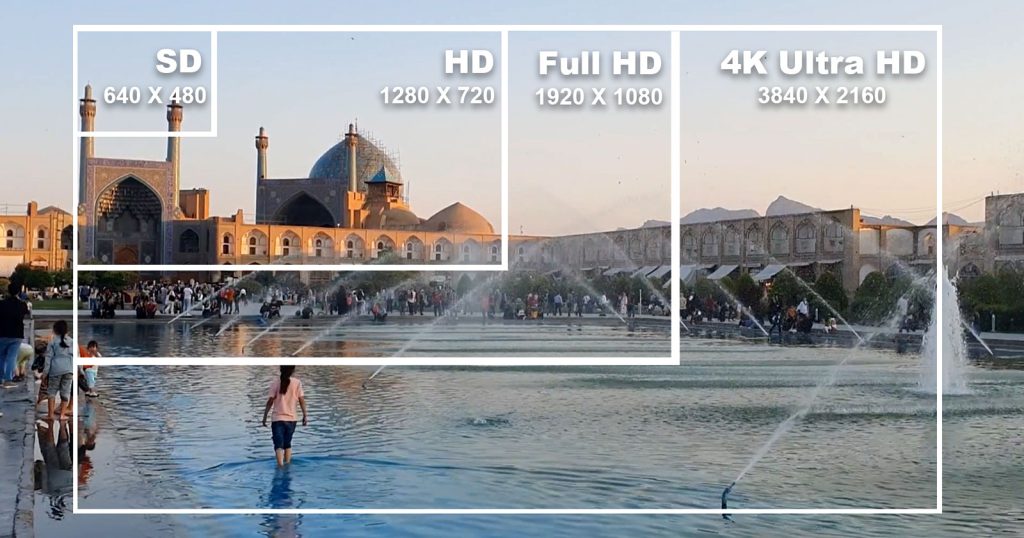
Choosing the Right Resolution and Frame Rate
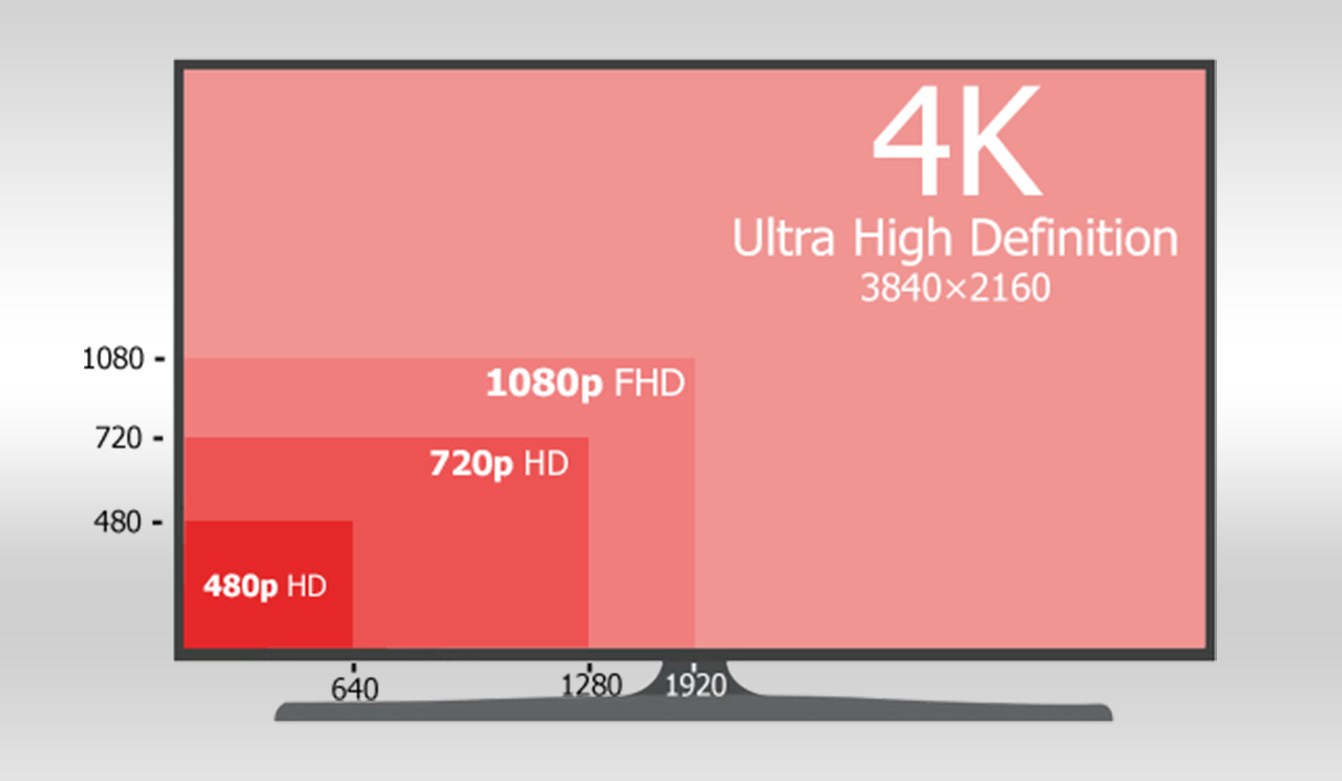
- Resolution 1080p or 4K: Ideal for capturing high-quality videos, such as documentaries, promotional videos, or YouTube content. These resolutions provide more detail but also consume more storage space
- Resolution 720p: Suitable for quick filming and situations where you need to save storage space, such as Instagram Stories or casual everyday videos. This resolution offers acceptable quality and takes up less space
- Frame Rate 30fps: Best for normal filming conditions and most online videos. 30 frames per second (fps) provides smooth and natural-looking motion, which is sufficient for most everyday shooting
- Frame Rate 60fps: Perfect for scenes with fast motion, such as filming sports, animals, or dynamic activities. 60fps shows smoother motion with more detail, making it ideal for recordings that require slow motion effects
Lighting When Filming with a Mobile Phone
- Use Natural Light: Film in natural light whenever possible, such as during the day or near a window. This type of lighting highlights faces and objects well and improves image quality
- Avoid Strong Backlighting: If the light source is behind the subject, it will cause the image to be dark and lose details. Always try to have the light source in front of the subject for better visibility of details
- Use Additional Light Sources: If natural light isn’t sufficient, use portable lamps or LED lights specifically designed for filming. These tools can provide soft and even lighting on the subject
- Check for Shadows: Before you start filming, ensure there are no unwanted shadows on the subject. Adjust the lighting so that the shadows appear soft and natural
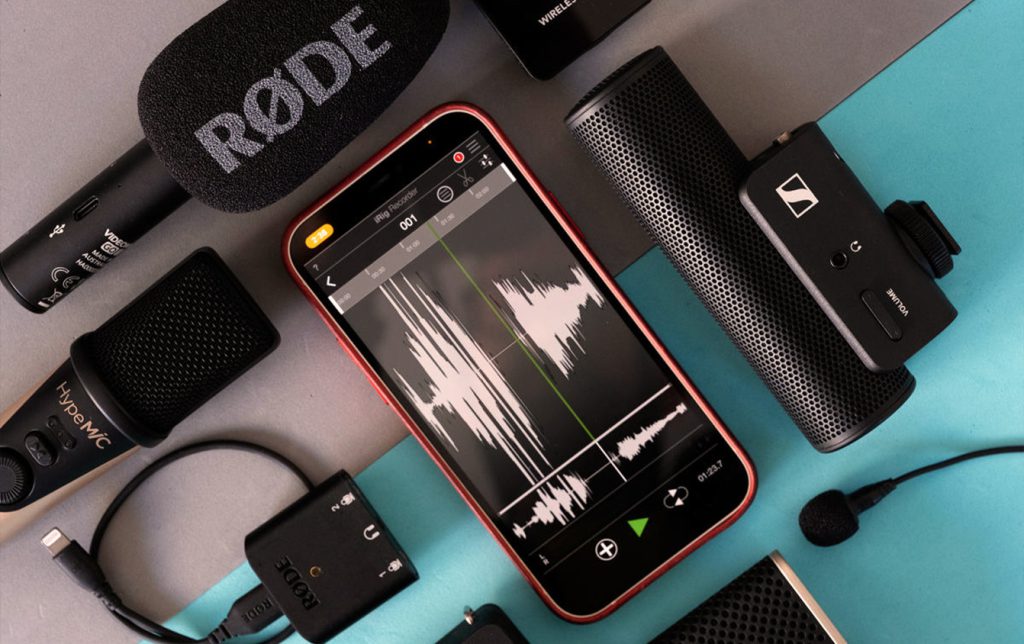
Audio When Filming with a Mobile Phone
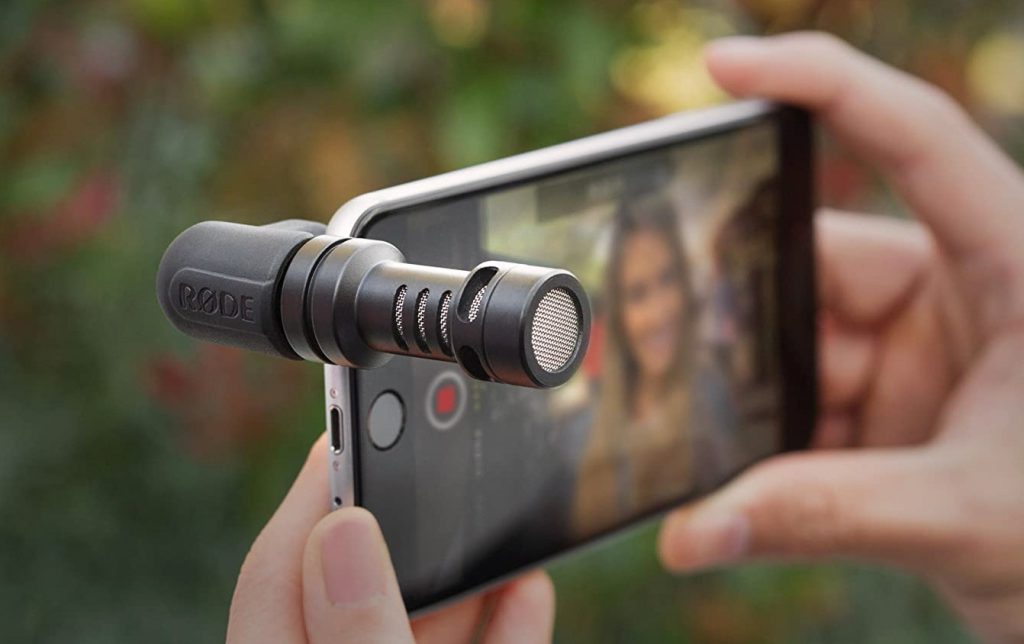
- Use an External Microphone: If possible, use external microphones such as lavaliere or shotgun mics. These mics improve sound quality and reduce background noise
- Choose a Quiet Location: Film in a quiet place with minimal background noise. Turn off noisy appliances like fans or air conditioners to enhance audio quality
- Check Sound Quality: Before you start filming, test the sound by recording a short clip. This ensures the audio is clear and free from unwanted noise
- Adjust Microphone Distance: Position the microphone at an appropriate distance from the sound source. Closer proximity will capture clearer and more direct audio, while being too far can reduce sound quality
Advanced Tips
How to Hold a Mobile Phone When Filming
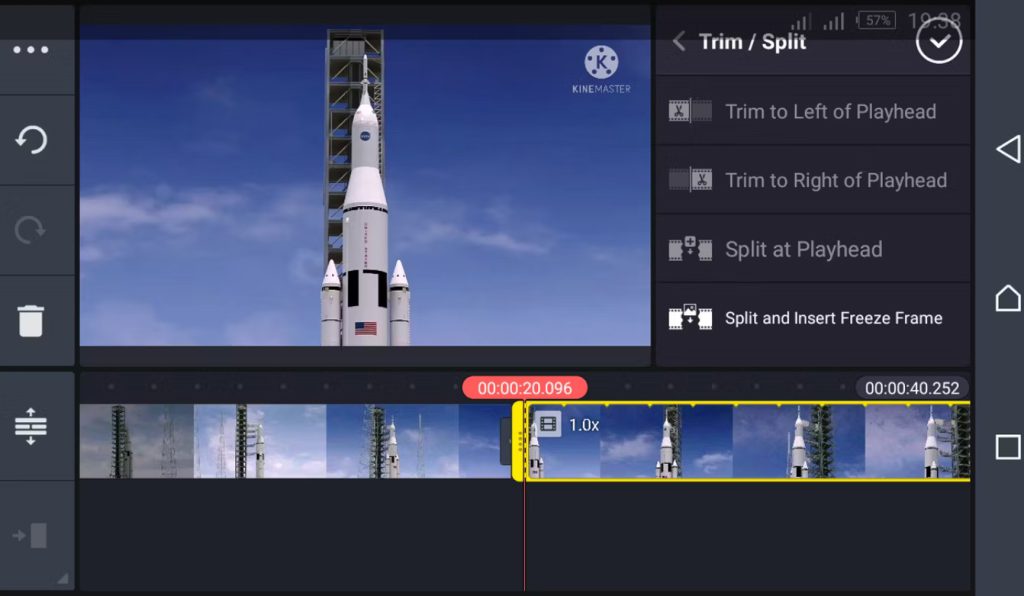
- Trim and Cut Unwanted Sections: Use trimming tools to remove unnecessary parts of your video. This helps make the video more cohesive and engaging
- Add Music and Sound Effects: Incorporate background music and sound effects to enhance the viewing experience. Choosing the right music can set the mood and tone of your video
- Adjust Color and Brightness: Use editing tools to adjust the color and brightness of your video. These adjustments improve visual quality and help make colors more consistent
- Use Safe and Free Editing Apps: Utilize free and reliable editing apps such as InShot, iMovie, and CapCut. These apps provide powerful editing tools and are easily accessible for basic video editing needs
- Sending Videos to News Broadcasters: If you plan to send your videos to news TV broadcasters, it’s best not to add music or audio effects. Sending the videos in their original form is usually preferred
Additional Equipment When Filming with a Mobile Phone
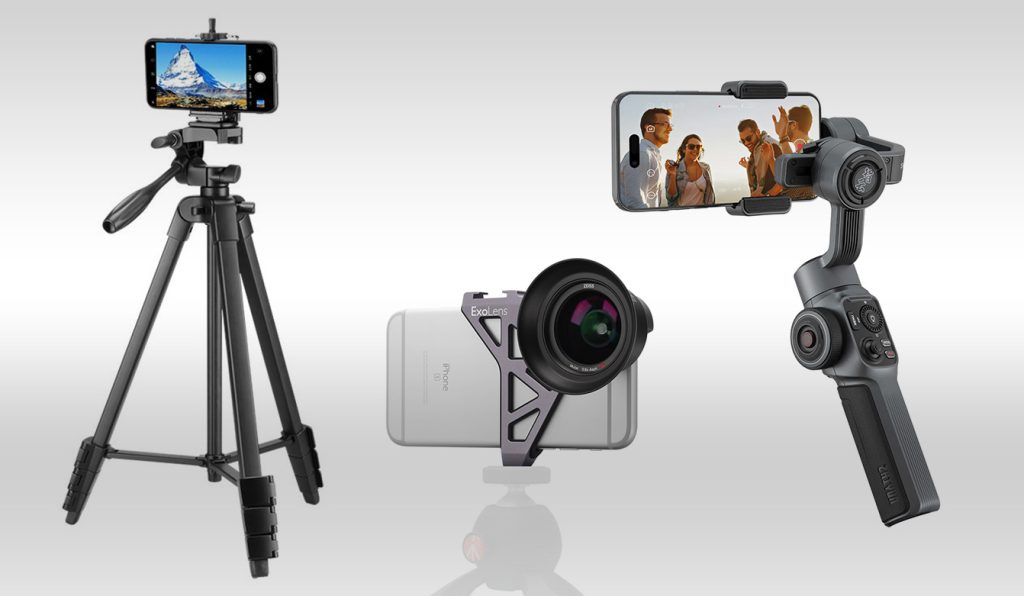
- Use a Tripod: For stable and steady shots, use a small tripod designed for smartphones. This tool helps you capture more professional-looking footage and improves image quality
- Gimbal: For filming while moving, use a gimbal. Gimbals reduce unwanted shakes and provide smooth motion, which is especially useful for dynamic and action scenes
- Additional Lenses: Enhance your filming versatility with additional smartphone lenses such as wide-angle, macro, or telephoto lenses. These lenses allow you to capture different angles and more detailed images
Security Tips
Protecting Privacy

- Blur Faces and Personal Information: If your video includes other people or personal information, blur them out before sharing or sending the video. Use editing tools to obscure faces and sensitive details to protect privacy
- Seek Permission: Always ask for permission before filming people, especially in public or private spaces. This helps avoid legal issues and respects personal privacy
- Be Cautious with Geotagging: Ensure that geotagging information (GPS data) is removed from the video, especially if it shows sensitive or private locations. This helps prevent the disclosure of sensitive locations
- Use Editing Apps for Privacy Protection: Utilize video editing apps to add blurring effects or remove sensitive information. These tools can help you maintain the privacy of individuals and locations in your video
Data Security

- Use Password Protection: Protect your recorded videos by using a password to lock your device or storage apps. This prevents unauthorized access to your files
- Back Up Videos Regularly: Regularly back up important videos. Use cloud storage or external drives to keep backup copies, which helps prevent data loss
- Check App Permissions: Before installing editing or storage apps, review their required permissions. Ensure that apps do not have unnecessary access to your data
- Delete Unnecessary Files: After filming and editing, delete unnecessary files from your device. This helps reduce security risks and frees up storage space
Do’s and Don’ts
Do’s
- Use Proper Lighting: Always use appropriate lighting for filming. Natural light or high-quality artificial light sources can enhance video clarity and quality
- Check Sound Quality: Ensure the audio in your video is clear. Using external microphones and choosing quiet locations can help improve sound quality
- Apply Framing Techniques: Use framing techniques like the rule of thirds to create visually appealing and balanced shots. These techniques enhance the visual quality of your video
- Regular Backups: Regularly back up important videos. This helps prevent data loss and increases the security of your data
Don’ts
- Avoid Poor Lighting: Do not film in poor lighting conditions, as this can reduce image quality and introduce noise into your video
- Ignore Privacy: Avoid filming people or private locations without permission. This can lead to legal issues and privacy violations
- Add Unnecessary Effects: Do not add unnecessary audio or visual effects to news videos. For submission to media outlets, it’s better to send the videos in their original form without additional changes
- Keep Unnecessary Files: Avoid keeping unnecessary or extra files on your device. This helps reduce storage usage and improves data security
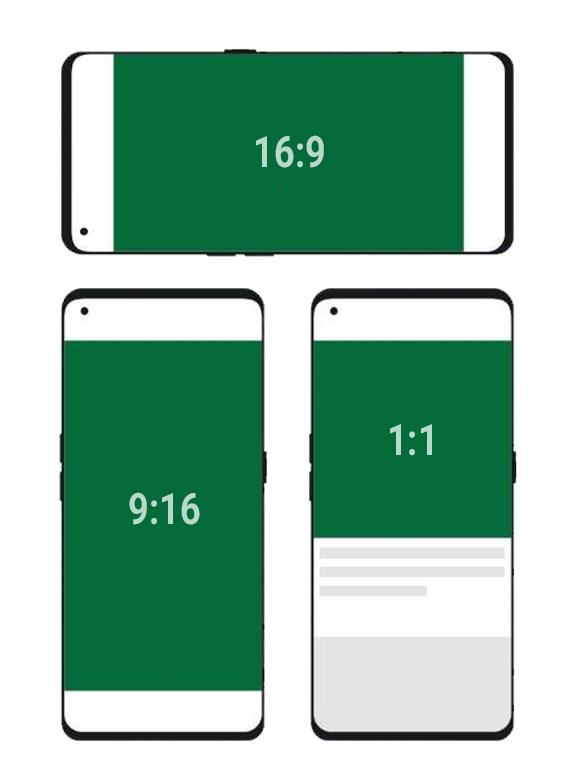
Common Aspect Ratios and Their Use with Mobile Phones
The ratio of the width to the height of the video frame. It determines how the video will appear on different screens
Square (1:1)
- Best For: Instagram posts, Facebook feeds, and Twitter posts
- Benefits: Ensures content is displayed uniformly in users’ feeds, providing a balanced and engaging view
Vertical (9:16)
- Best For: Instagram Stories, Facebook Stories, TikTok videos, and Snapchat
- Benefits: Optimized for mobile screens, offering a full-screen vertical view that enhances engagement
Horizontal (16:9)
- Best For: YouTube videos, Facebook video posts, and LinkedIn video posts
- Benefits: Ideal for landscape videos and content that benefits from a wider frame, providing a cinematic and professional appearance
Portrait (4:5)
- Best For: Instagram feed posts and Facebook feed posts
- Benefits: Offers a taller view compared to square formats, making it suitable for portraits and content that requires a vertical emphasis
Social Media Formats
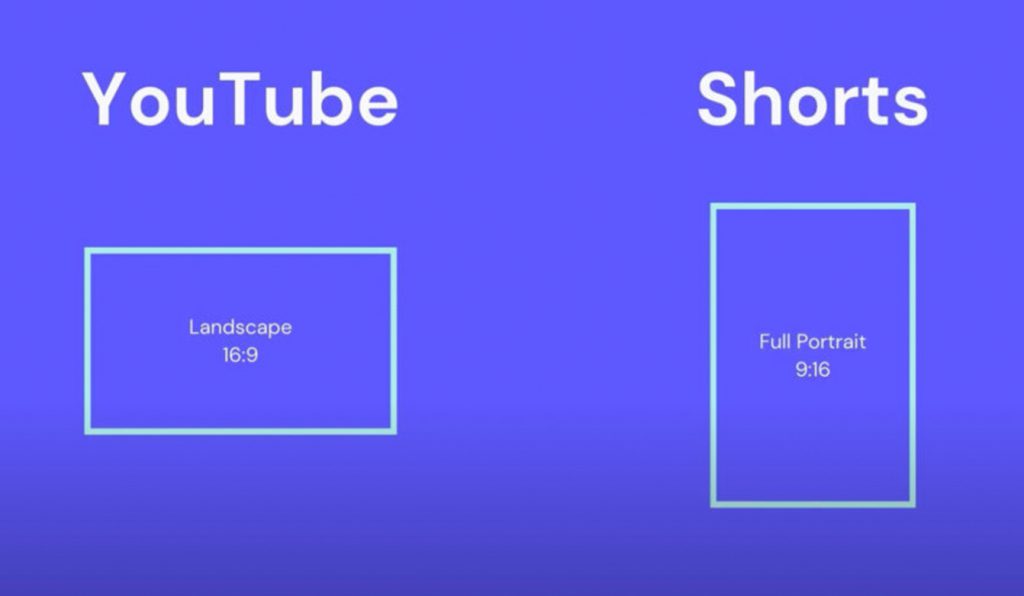
YouTube
- Resolution: Optimal resolutions include 1080p (Full HD) and 4K for high-quality video
- Aspect Ratio: 16:9 is the standard aspect ratio for YouTube videos
- Frame Rate: 30fps is standard, but 60fps can be used for smoother motion
- Resolution: 1080p (Full HD) is recommended for high-quality videos. For Facebook Stories, 720p is sufficient
- Aspect Ratio: 16:9 for landscape videos, 1:1 for square posts, and 9:16 for vertical Stories
- Frame Rate: 30fps is commonly used, but 60fps can be employed for more dynamic content

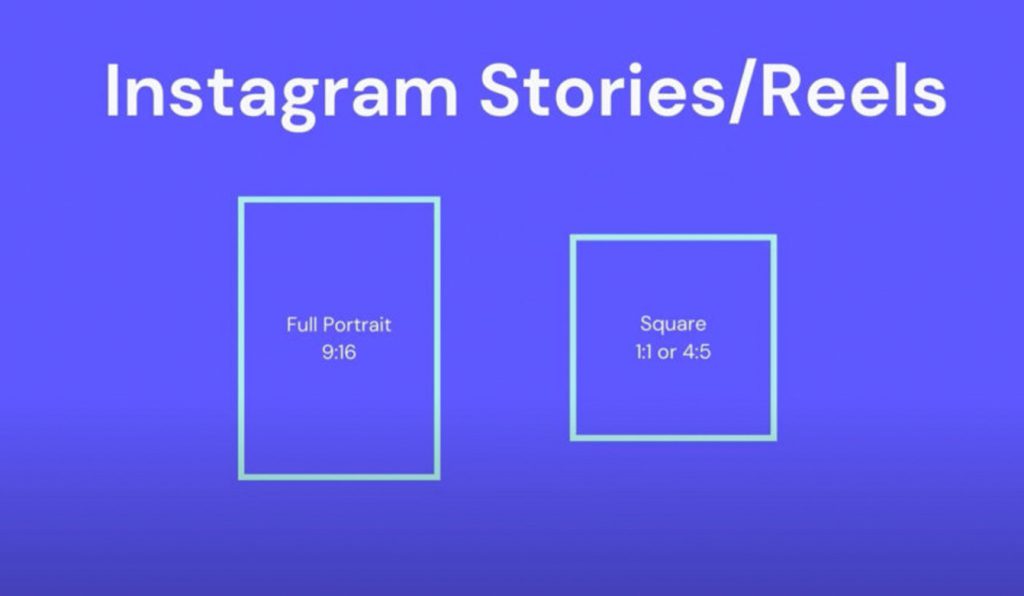
- Resolution: 1080p (Full HD) is ideal for posts and Stories
- Aspect Ratio: 1:1 for square posts, 4:5 for portrait posts, and 9:16 for Stories
- Frame Rate: 30fps is standard; 60fps can be used for smoother video
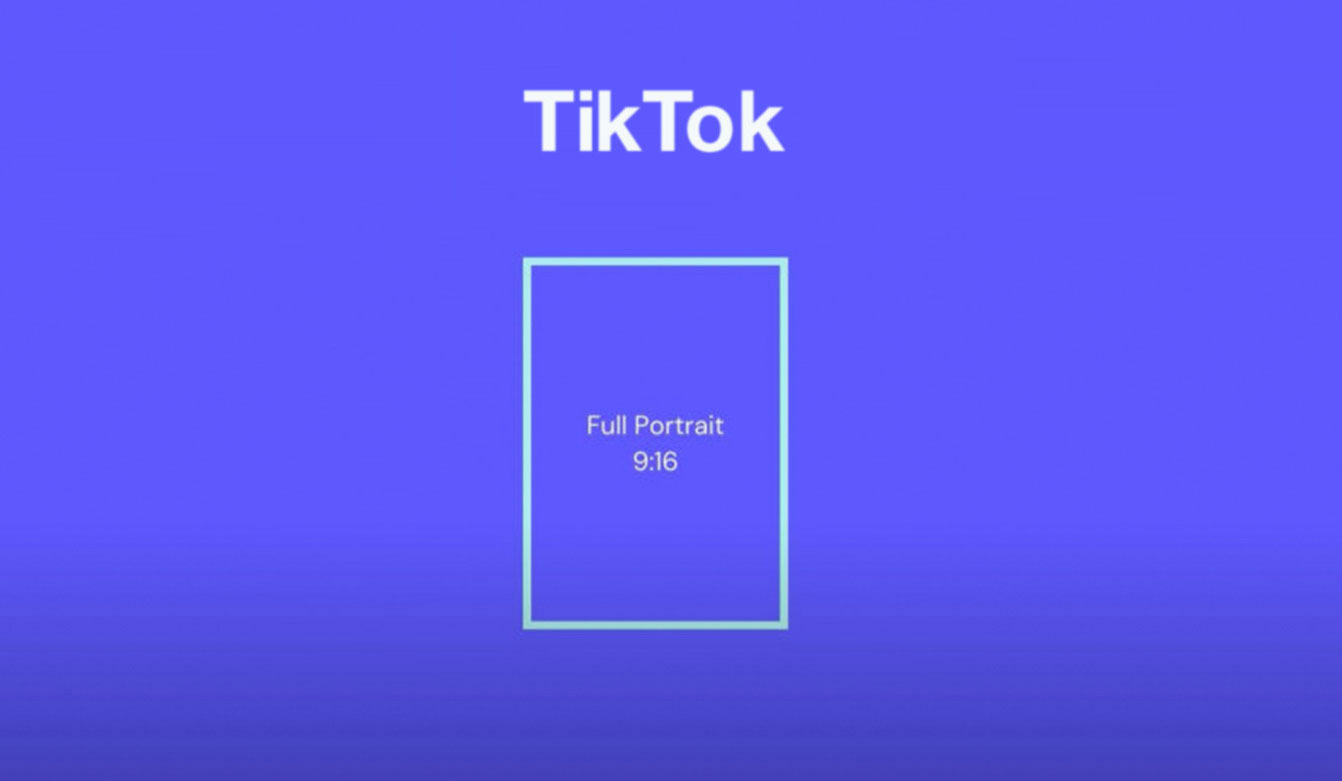
TikTok
- Resolution: 1080p (Full HD) is recommended for high-quality videos
- Aspect Ratio: 9:16 for vertical videos
- Frame Rate: 30fps is standard; 60fps can be used for smoother video
X (Twitter)
- Resolution: 720p is generally sufficient, but 1080p can be used for higher quality
- Aspect Ratio: 16:9 for landscape videos and 1:1 for square images in tweets
- Frame Rate: 30fps is standard, but 60fps can be used for high-motion content

TV Broadcast
- Resolution: 1080p (Full HD) and 4K are suitable for high-quality TV broadcasts
- Aspect Ratio: 16:9 is the standard aspect ratio for TV broadcasts
- Frame Rate: 30fps is standard, but 60fps can be used for faster-moving content and smoother playback
About the Project
At Creative Story Lab, we are passionate about helping everyone tell their stories through simple and accessible tools. Whether you’re a beginner or a professional, our platform offers easy-to-follow tutorials on mobile filmmaking, storytelling, and multimedia creation. Currently available in English, Persian, Kurdish, Baluchi, and Arabic, our platform is continually evolving to include new educational content and reach a wider audience. We aim to be a hub for creative individuals seeking to enhance their storytelling and video production skills, regardless of experience level. Join us and bring your stories to life!